
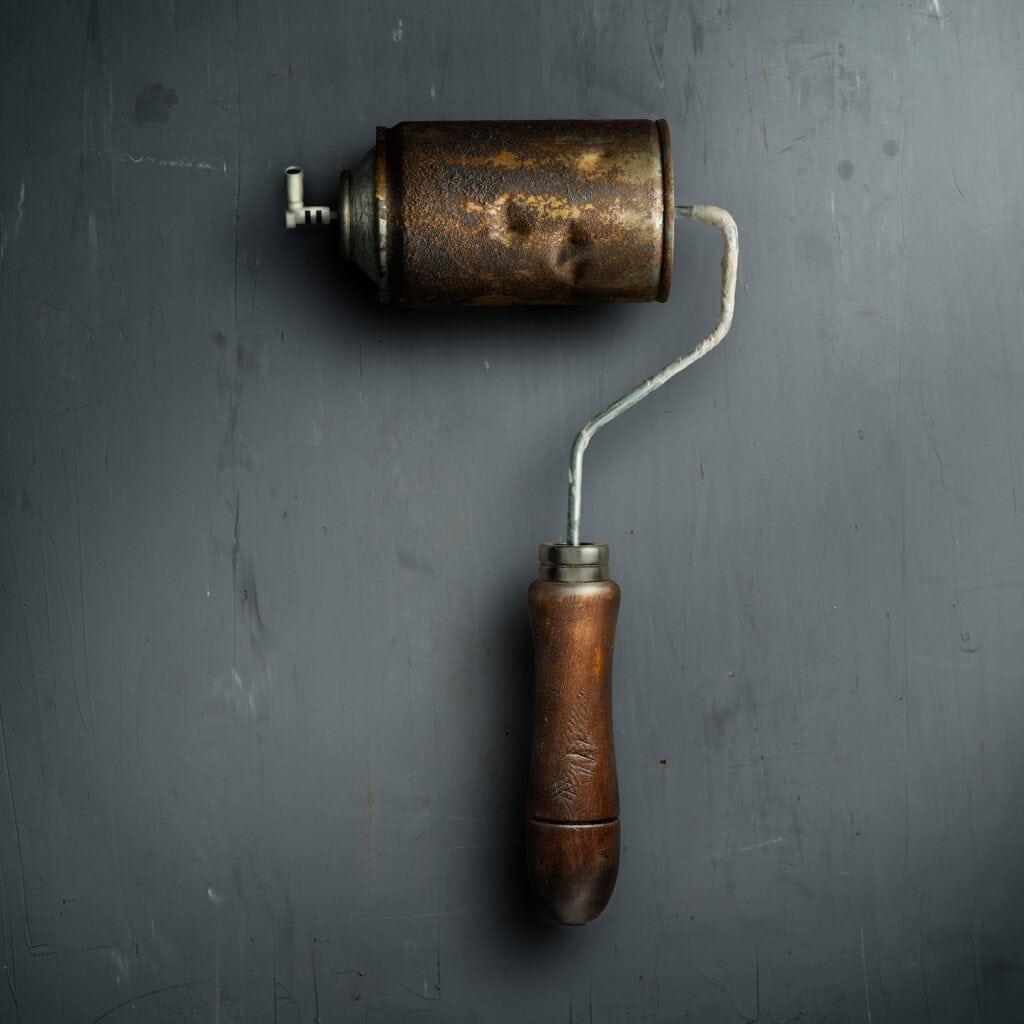
Light Painting in Still Life: What It Is and How to Light with a Flashlight
Can you imagine sculpting the lighting in your photos as if you were holding a paintbrush? Light painting allows you to decide with precise accuracy where the light falls on each object in a still life—where it focuses, where it softens, and where it fades out. With traditional lighting setups, it’s difficult to reach this level of detail in volumes, textures, and nuances.
In this article, I’ll explain how I work, how this technique performs compared to conventional studio lighting, and how you can try it out today using very affordable, or even homemade, tools.
What Is Light Painting Photography?
Light painting is a lighting technique based on long exposure: while the shutter remains open, you move a light source (usually a flashlight) to “paint” the scene. For it to work, you need as little ambient light as possible, or ideally, total darkness.
Depending on where you point the flashlight, the result changes completely:
Direct light to the sensor: If you point the flashlight toward the lens, the camera records the trail of its movement. These are the typical photos of light drawings or car headlights at night.
Projected light: If you illuminate an object, the sensor captures the reflection of the light off its surface. This is the method applied in still life photography.
For a still life, I mount the camera on a stable tripod and select Bulb mode (“B” setting), which lets me manually control how long the shutter stays open. During that interval, I move the light over the objects I want to highlight. Further down, in the technical specs, you can see the settings I use.
Static Lighting vs. Moving Light
Light painting has unique characteristics that make it completely different from standard studio lighting.
The most traditional way to light a still life involves using natural light from a window, or continuous artificial lights and flashes with countless modifiers. You only need to visit any photography gear website to find a massive catalog: diffusers, honeycombs, softboxes, or snoots. Anything you can imagine is out there for sale.
The principles behind all traditional methods are always the same: the size of the light source, the distance to the subject, and the intensity.
However, when we talk about light painting, a crucial new variable comes into play: the movement of the light source. Our flashlight doesn’t stay static; it “paints” the object, allowing us to decide with absolute precision where to apply more light, where to create a smooth transition, or where to keep the lighting subtle.
Three Ways to Light the Same Still Life: A Practical Case Study
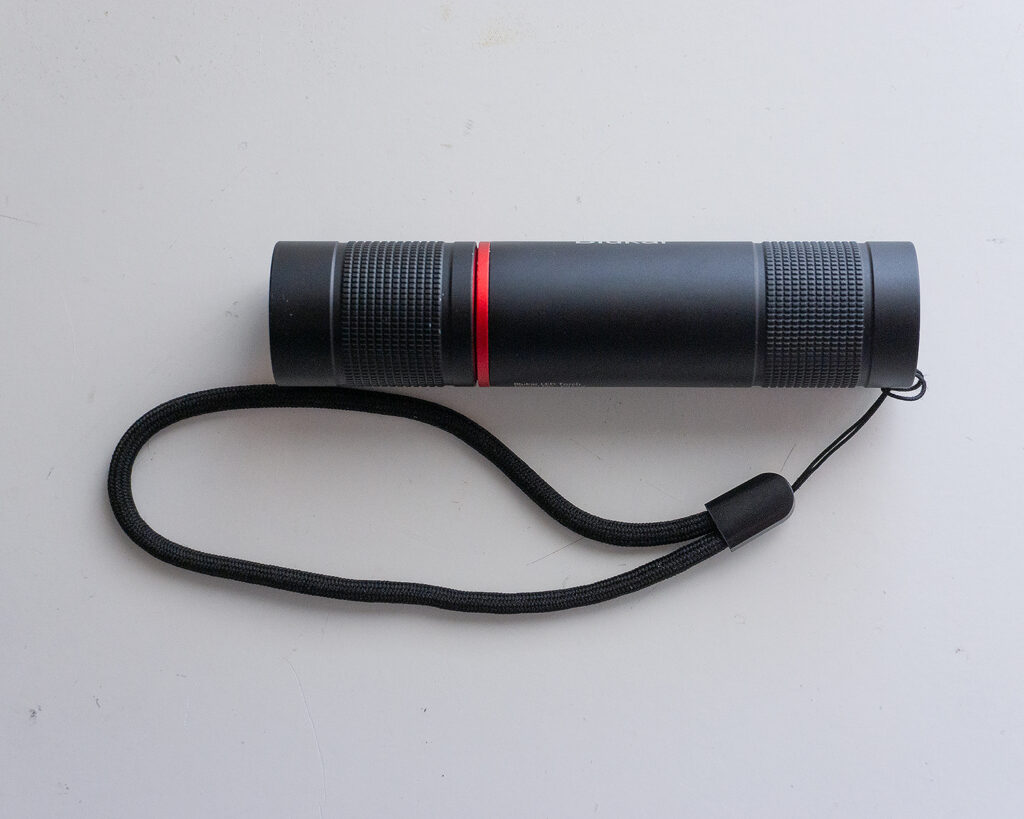
To prove that technique matters more than budget, I light the same subject—a stack of round boxes—three times using just a single source: a rechargeable flashlight that costs around €10, the kind you would use for hiking or when the power goes out at home. It’s not a special photography flashlight, nor does it have any advanced features.
We will take three shots of the same object (in this case, stacked boxes) using three variations: hard light, soft light, and light painting.
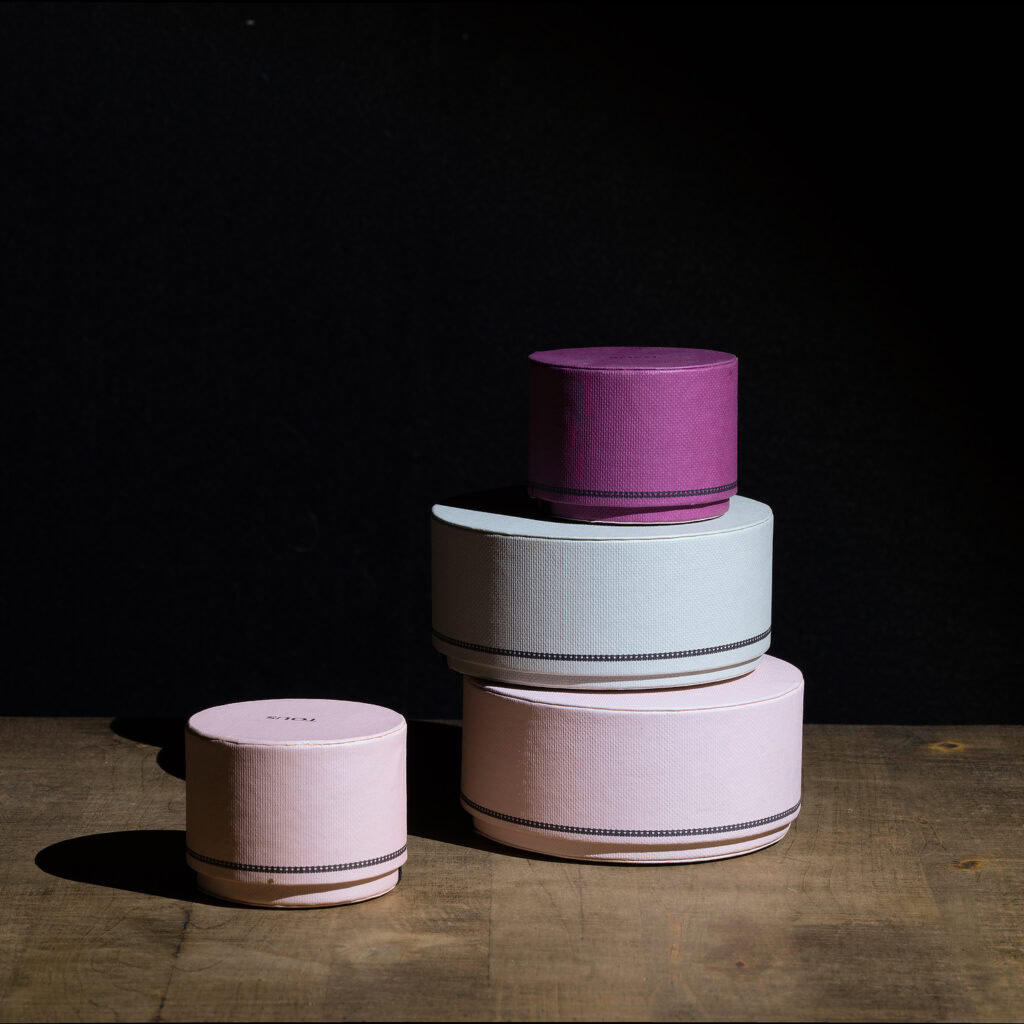
1. Hard Light (Direct Light)
In the first case, I fixed the flashlight onto a tripod, pointing it toward the object at roughly a 45-degree angle. The result is hard lighting, with very sharp shadows and abrupt transitions between highlights and shadows.
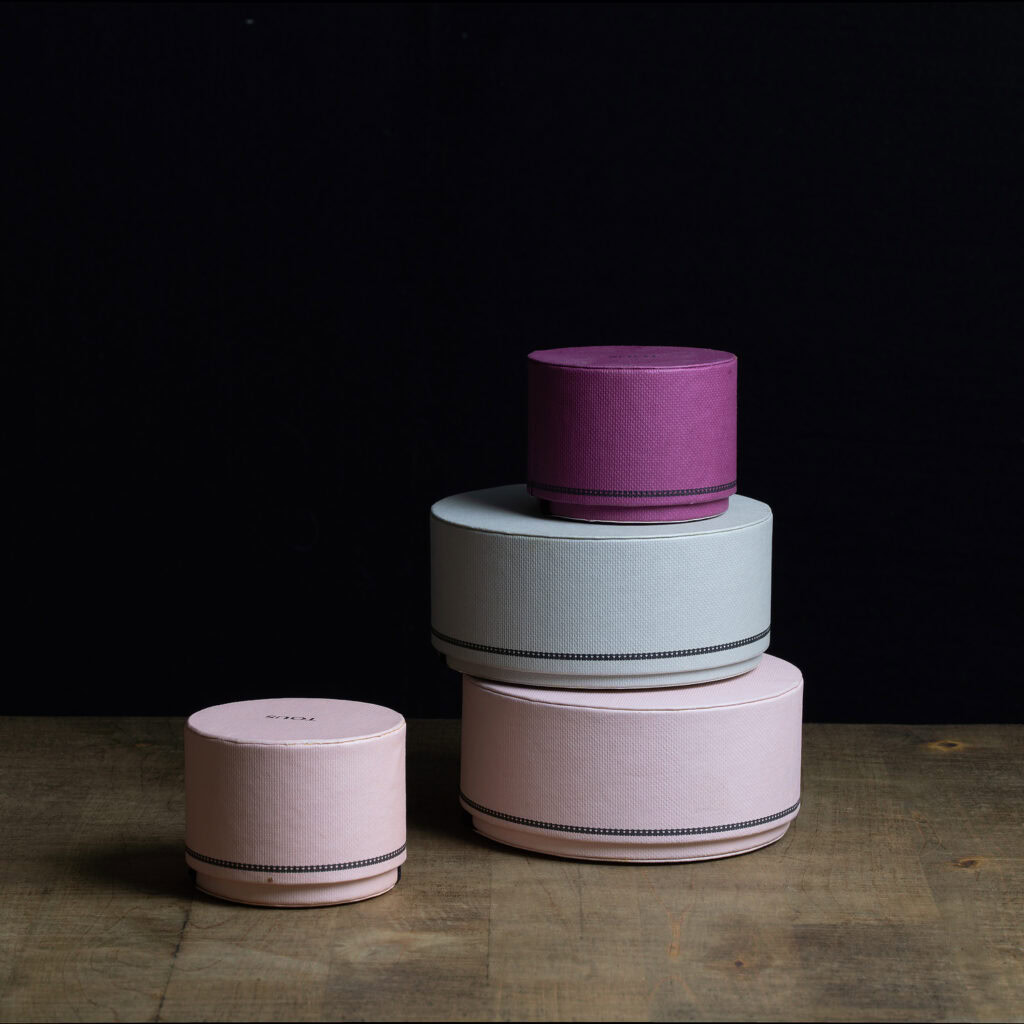
2. Soft Light (With a Homemade Diffuser)
In this second case, the only thing I added was a homemade diffuser between the flashlight and the boxes. The flashlight’s light is projected onto the diffuser, which scatters it in multiple directions. In this way, we transform a hard light (a point light source) into a soft light (a relatively larger light source).
I emphasize that the diffuser is homemade because big budgets and sophisticated materials are not necessary; in this specific case, I used a shower curtain stretched over a wooden frame. The result is much softer shadows and even lighting.
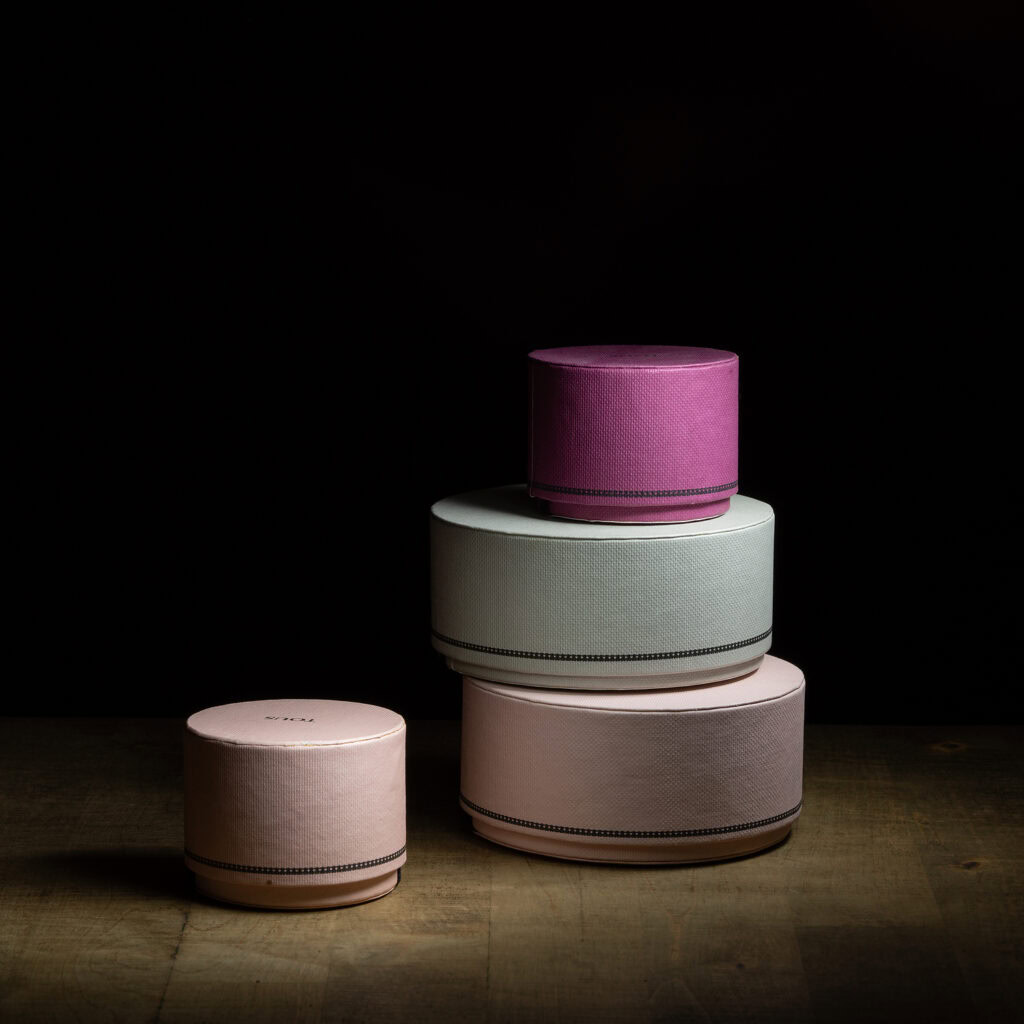
3. Light Painting (With a 90-Degree Modifier)
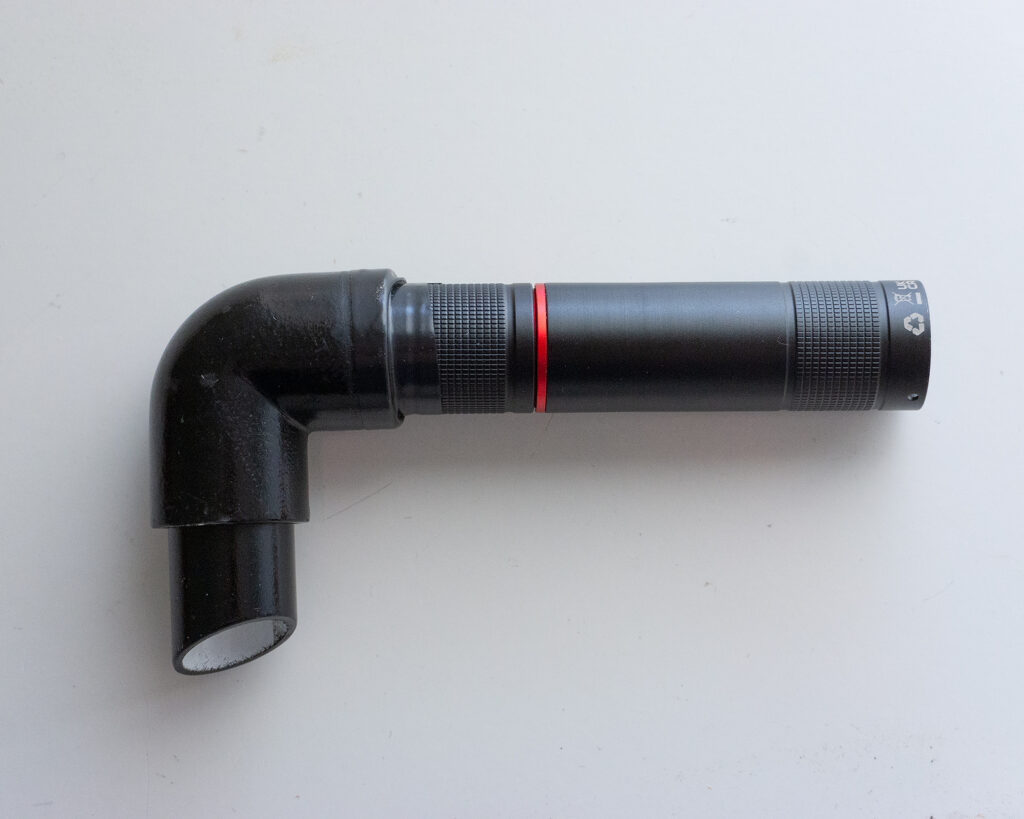
For this third shot, I used the same flashlight, but I attached a 90-degree PVC elbow pipe, painted black on the outside and white on the inside. This accessory achieves two things: the white interior softens the projected light, and the 90-degree angle prevents direct light from the flashlight from leaking toward the camera sensor during the movement.
To light the boxes, we painted with the flashlight at an approximate 45-degree angle, continuously sweeping the beam of light from one side of the object to the other. You can see the exact process in the session video included below.
💡 Note on the accessory: Harold Ross, whom I trained with in light painting, sells an excellent quality professional version in his store: [buy this modifier]. If you prefer to make it yourself, you will need a PVC elbow pipe, black paint for the outside, white paint for the inside, and a way to attach it to your flashlight.
Comparison of Results
If we look at the three shots, the differences are obvious:
With light painting, the highlight areas have less contrast than the hard light shot, but more than the soft light shot.
In the shadow areas, light painting hits an ideal middle ground: we achieve a more pronounced and dimensional shadow than with soft light, but with a far more aesthetic and gradual transition from highlights to shadows than with hard light.
None of these lighting setups is inherently better than the others, but it is undeniable that with light painting, we gain absolute control. Playing with the distance, angle, and movement of the light source allows us to “sculpt with light”—a term that perfectly defines this discipline.
In these photos, you can see the flashlight I use in most cases. On the left is the flashlight alone, and on the right is the flashlight with the 90-degree elbow pipe.
My Workflow: Painting Each Object Separately and Blending
When I create a still life art photograph, there is usually more than one object in the composition. If I tried to paint the entire scene in a single long exposure, the bounced light would end up contaminating the rest of the elements.
To maintain pinpoint control, my workflow is broken down into the following steps:
- Composition: I set up the scene and frame the still life with the camera firmly mounted on the tripod.
- Darkness: I turn off the room lights completely and set the camera to Bulb mode.
- Individual Shots: I take a first exposure painting each object in the scene with the flashlight, until the entire scene is covered.
- Blending in Post-Processing: I import all the captures into photo editing software (such as Adobe Photoshop). I use layers and blend modes (usually “Lighten” mode) to combine only the perfectly lit areas of each shot into a single final image.
Video: This Is How You Light Paint (Making-of)
So you can see how theory translates into practice, in this making-of video I show you exactly how I lit the boxes in the dark, moving the flashlight to shape their textures. To make the flashlight visible, instead of doing it in total darkness, I turned on an ambient light that isn’t there when we actually shoot.
Light Painting Frequently Asked Questions (FAQ)
What is light painting?
It is a photographic technique where a mobile light source (such as a flashlight) is moved during a long exposure to illuminate specific areas of a scene. Instead of placing flashes in fixed positions, the photographer manually “paints” the subject.
What is the difference between hard light and soft light?
Hard light comes from small or distant sources and produces very sharp shadows with abrupt transitions. Soft light comes from large, close, or diffused sources and creates progressive, subtle shadows. Light painting can combine the best of both worlds thanks to the movement of the light source.
Do I need a special flashlight for light painting?
No. Technique, practice, and understanding how light behaves matter more than the gear. An affordable hiking flashlight and a homemade modifier, like a PVC elbow pipe, are enough to get started and achieve great results.
Why take multiple shots instead of just one?
Because when you illuminate one element, it is easy for the light to bounce and contaminate neighboring objects. By photographing each object separately and blending the layers in post-processing, every component of the still life receives the exact light, direction, and intensity you designed.